Saturday, April 23, 2011

Beach Profiling


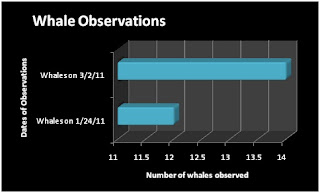
Left: Current Map of Kalepolepo Beach after recording the data of a
floating fruit. Right: Graph of our Beach Profiling data.


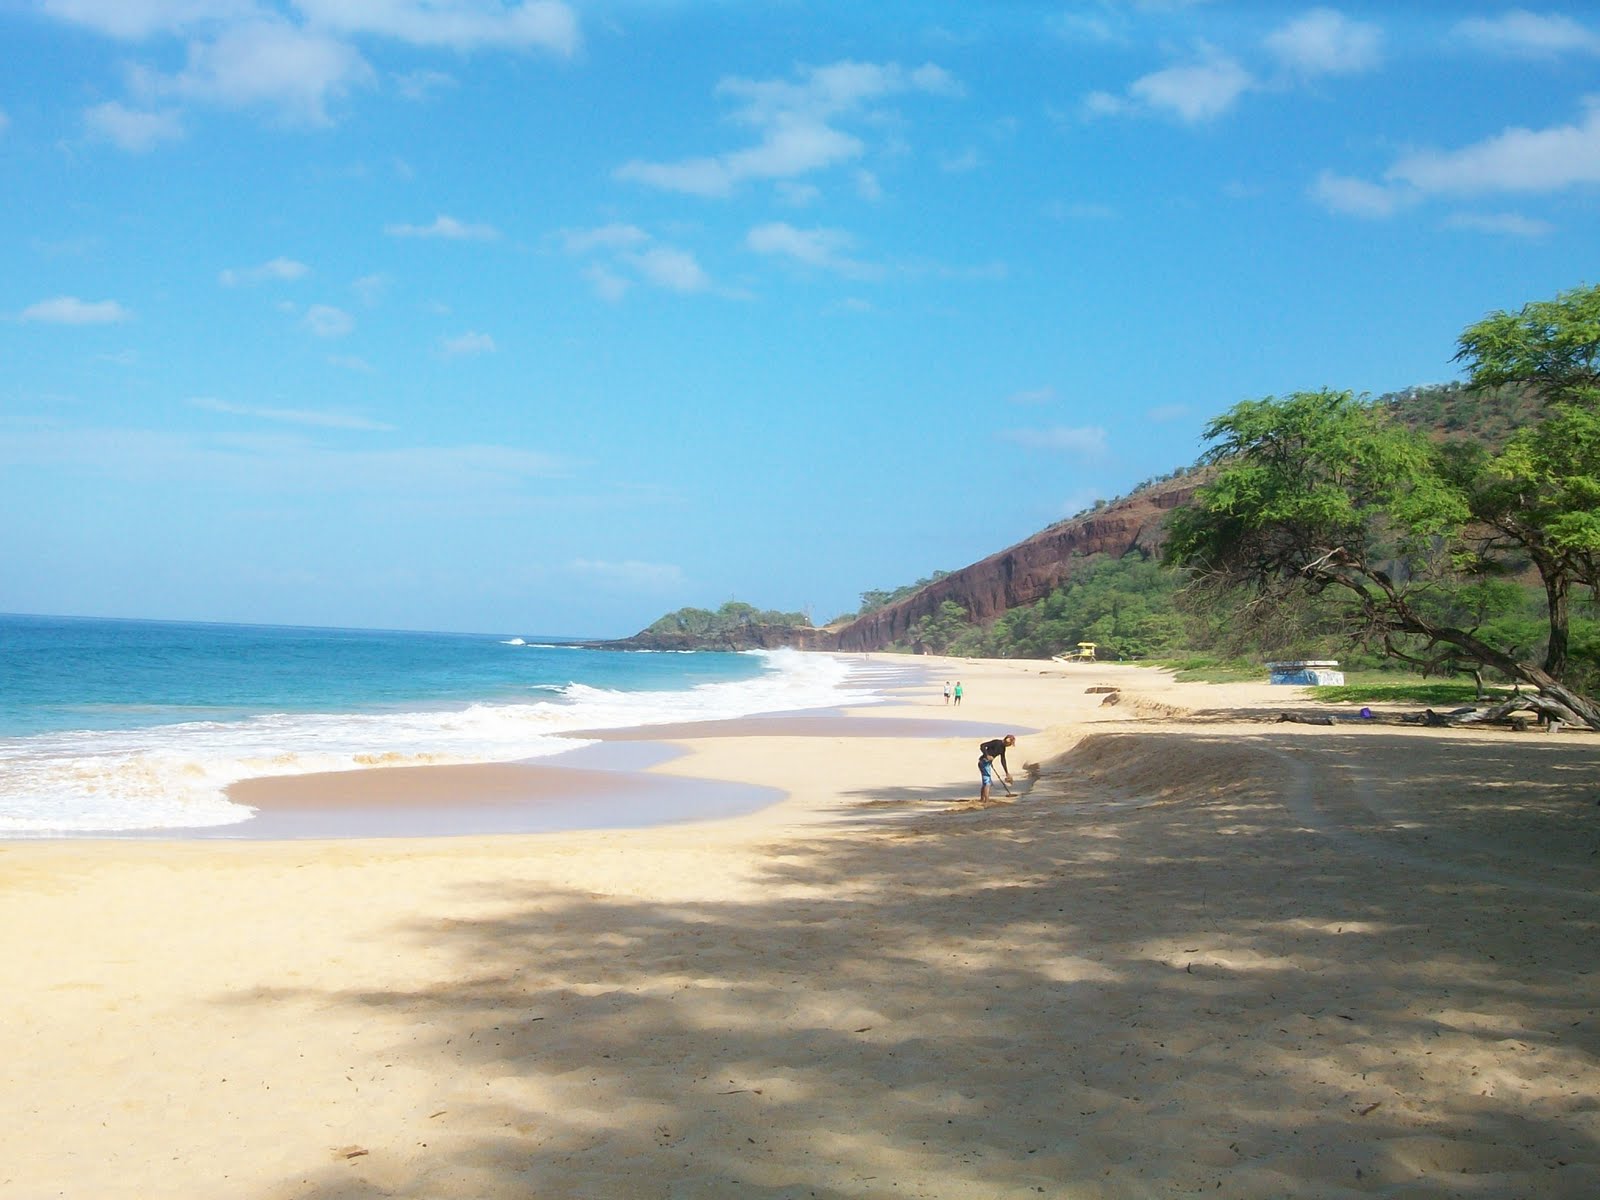
Beach Profiling is a method used to determine the transverse profile of a beach. This process is usually done with leveling rods and transect tape. Some physcial factors may affect a beach profile such as high sand dunes and a high tide which would make it impossible the measure the entire beach profile unless you were willing to go in the water to get the data. After storms some physical features of the beach may be unstable or harder to get the correct data due to debris and other things in the way.


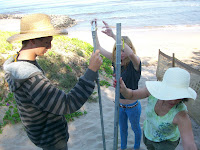
1. Collect all materials: trasect tape, GPS, compass, rise and run tool (leveling rod), data sheet, and pen/pencil.

2. Once at the beach near the dune you are going to use to gather your data, use your GPS and record the longitude and latitude of the vacinity.

3. Using the transect tape starting from your desired point, lay down a line perpindicular to the water line.

4. Now, use your compass to determine the degree/direction of the transect line laid out. Record on data sheet.

5. Use the run tool (pointing down and along the trasect tape line) and use the level to make it leveled.

6. Now place the rise tool on the opposite end of the run and make sure they are both completley leveled.

7. Look to see where the run tools intersects with the rise and record it at the rise between points A and B. *This number if the dune tilts up should be a negative number.

8. Note any distinctive physical features between the rise and run tools and on the dune.

9. Now move the foot of the run tool at the exact point where the rise tool was located and move the rise tool to the other side to get more data. Make sure the run tool remains level and perpindicular to the water.

10. Complete steps 5-9 down until you reach passed the shoreline to collect all necessary data for your beach profiling.

This is a picture of Ms. S helping Holly and Lucas at our starting point, we were trying to figure out whether the rise or run tool was at the top of the point. On the right is a picture of Allie and Lucas on top of the dune gathering data.


Tuesday, April 12, 2011

Sand Orgins Pre-Lab

There are two different origins of sand; biogenic and detrital. The chemical reaction between vinegar and sand determines the type of sand. If the sand bubbles when vinegar is added it is biogenic, if it does not bubble when vinegar is added then it is detrital. In this lab we will test different samples of sand with vinegar to determine the origin.


Question: Which beaches in south Maui will prove to be biogenic or detrital?


Hypothesis: I believe that Big Beach will contain biogenic sand since there is more reef surrounding the shoreline and I think that Black Sand Beach will be detrital because of all the cliffs and eroding materials around it. If the sand at big beach is biogenic than the sand will bubble when we add vinegar and if the sand at black sand beach really is detrital than it will not bubble when vinegar is added.


Materials: Pipette, pencil, sand, vinegar, container, notebook

Procedure:
1. Collect sand from chosen beaches and make observations of the beach surroundings in your journal
2. Gather remaining materials
3. Using the papette add vinegar to the sand
4. Observe any possible chemical reactions
5. Note chemical reactions and use the following formula to determine the origin of the sand
6. 2CH3COOH + CaCO3 ----> Ca(CH3COO)2 + H2O + CO2


Data:
Field Observations- On Monday Aprill 11th I was not able to make it to school but the class headed to collect sand samples at the following beaches and this is the data that was collected according to Meera Mennies:

"At Keawakapu I observed lava rocks on both ends of the beach and the sand was more a white/tan color.


At Kamaole 1 I observed rocks off of each end of the beach. Signs to protect coral reef suggests that there is a large amount of coral off shore. There was also sand dunes acting as protective barriers from the street.


At Sugar Beach I observed a lot of rocks and the sand was darker than the other sand samples. I also noticed that the water was very murky and I'm not sure what that means, but it might be an indication of animal and water activity which is related to the sand."


Observations:

Big Beach Sand: Light brown, tan, white, small shells, slightly fine.

After Vinegar: Noticeably bubbly, crackling sounds, which proves the sand at big beach to be biogenic.


Black Sand: Black, dark red, white, dark brown, consists of mostly rock sediment.

After Vinegar: Minumal bubble reaction which shows that the sand from black sand beach is slighty detrital.


Conclusion: After adding the vinegar to each of our sand samples I have concluded that my hypothesis was mostly correct. The sand taken from Big Beach is Biogenic because of the noticeably bubbly reaction the vinegar had caused. The sand from Black sand beach had very minimal bubble reactions, which means it is slightly detrital. We could have made a couple possible sources of error such as: testing the wrong sand samples, not adding enough drops of vinegar, or just getting a bad sample from the beach. I thought it was interesting to see what is in the sand of the beaches I usually go to all the time, even though I didnt participate much in this lab due to being sick and my broken wrist. I still enjoyed the learning about something cool, like the beach!


This was taken from our observations at Big Beach when we collected our sand samples! and on the right is a picture of the Black Sand Beach taken by my classmates while collecting data in the field.

Tuesday, January 25, 2011

Whale Observation

During this third quarter of our science class we are focusing on the observation of Hawaiian Humpback whales. The purpose is to develop a better understanding of the humpbacks whales. I am going to be trying to determine whether there are more humpback whales in Hawaii during the beginning of the migration period or towards the end. I believe there will be more whale activity during the beginning of the season, this will probably be because of the decrease of the water temperature in Alaska so according the their animal instincts they try to begin to migrate as soon as possible. For the first half of our observation the class went to McGregors point where we recorded data on all the whales discovered while there. It feels really good doing work out of the classroom and actually interacting and doing work in an outside enviroment. I was suprised about how many whales we saw during our first observation, even though we could only see them blowing water out of their spouts. It was much more interesting than it was challenging.

Using a Clinometer helps us determine the distance of the whales we are observing.


First, we look through the straw directly at the whale. Whatever number the weight falls on is the angle of inclination. Next, we find the elevation by using a GPS device. Add the numbers into the following formula: Distance=elevation*tan(angle).


On our trip to mcGregors point we had discovered 12 whales and during our whale watch we spotted 14!


Sadly, I wasn't able to make it to the whale watch segment of our lab due to the fact that I have motion sickness and always tend to get sea sick. It would've been a very amazing experience since I've never been on a whale watch and it was upsetting I had to miss out. Thanks to my friends who did go on the whale watch I collected all the data needed to come up with my conclusion:


More whales were discovered during the end of the migration period which proved my hypothesis to be wrong :( We could've made many errors during our collection of data, like miscounting the whales or the weather could have been to blame. I've learned alot about whales which definitley makes me appreciate them more!